Your client fills in their own details and uploads documents through a secure link. Nothing is created until you confirm it. One link can cover several entities, such as a person, their company and their trust.
Do this once.
Go to Settings and select Client onboarding.
Choose an Entity type.
On Details to collect, choose the details you want.
On Documents to collect, set each Collection option to Required, Optional or Not requested.
Repeat for each entity type, then select Save firm defaults.
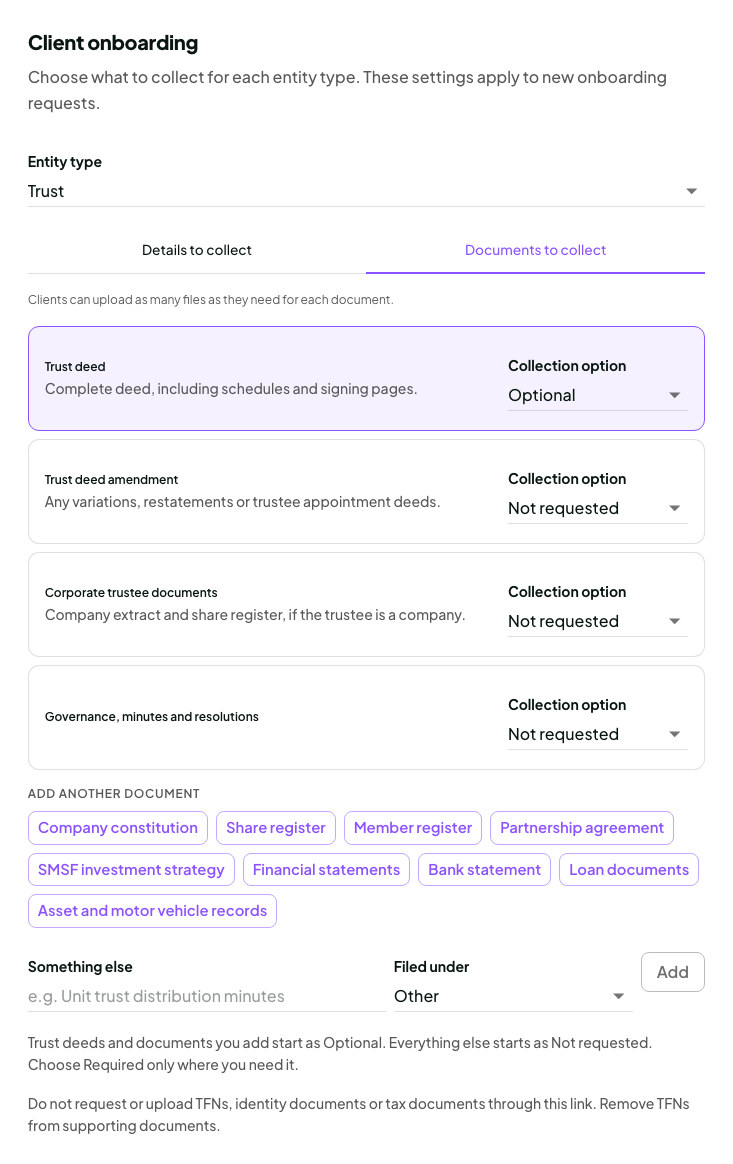
To request something not listed, enter it under Something else. New defaults apply to new invites only.
Go to Clients. Select the arrow next to New client, then Invite client to self-onboard.
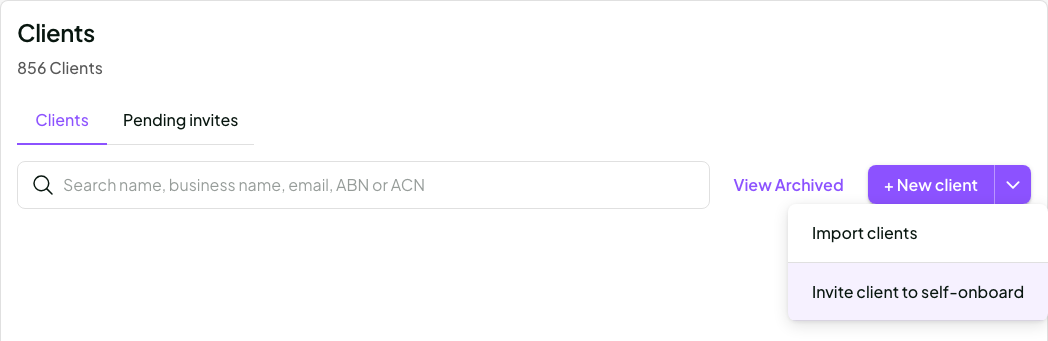
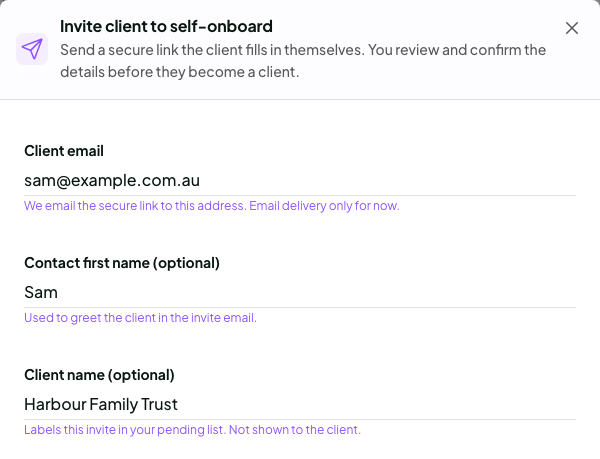
Enter the Client email. Add a Contact first name to greet them by name.
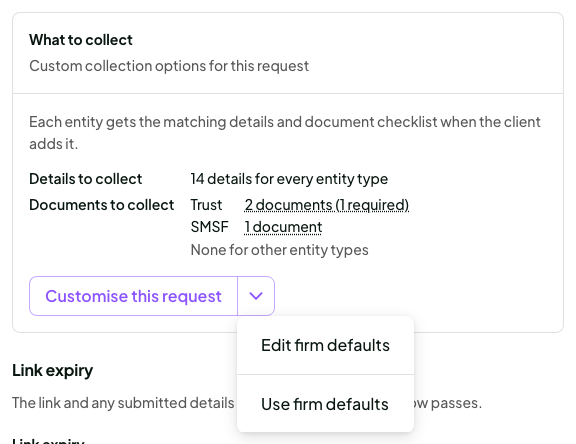
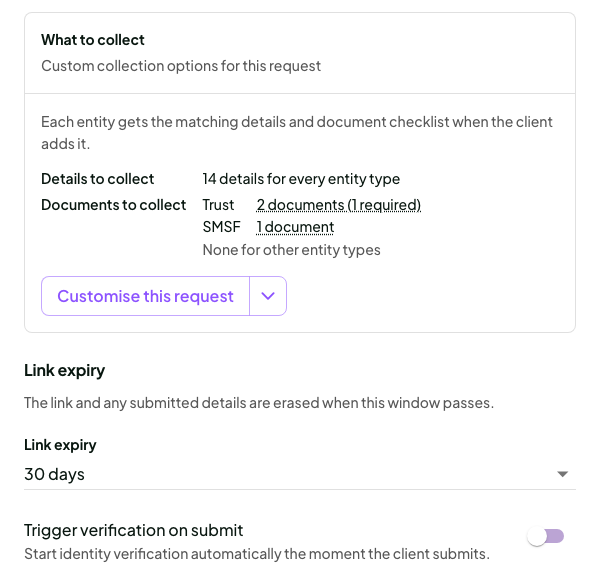
Check What to collect. To change it for this client only, select Customise this request. The arrow beside it has Edit firm defaults and Use firm defaults, which undoes your changes.
Choose the Link expiry, up to 30 days.
Select Send invite.
Important: don't request TFNs, ID or tax documents through this link.
Select the Pending invites tab.
Resend sends a new link and stops the old one.
Cancel stops the link straight away.
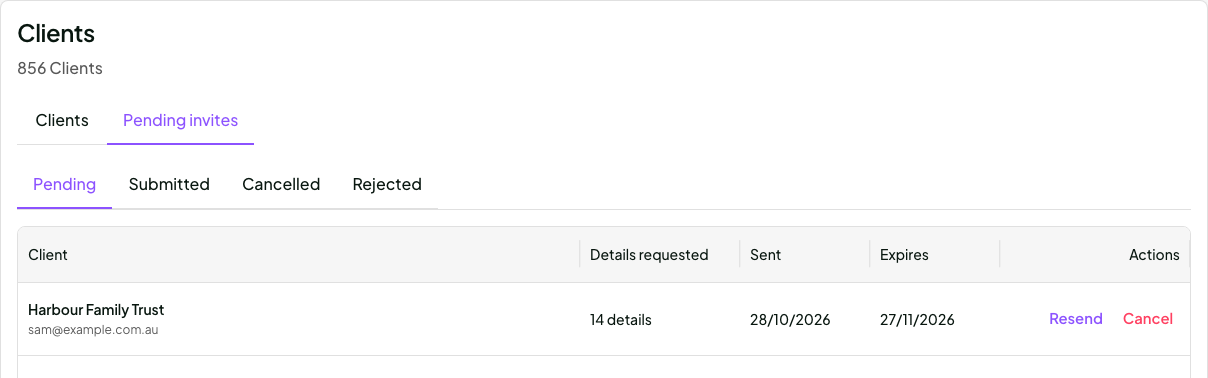
In Pending invites, select Submitted, then Review.
Check the details and open any documents. Select the copy icon next to a value to paste it into your practice software.
Select Confirm and create client, or Reject.
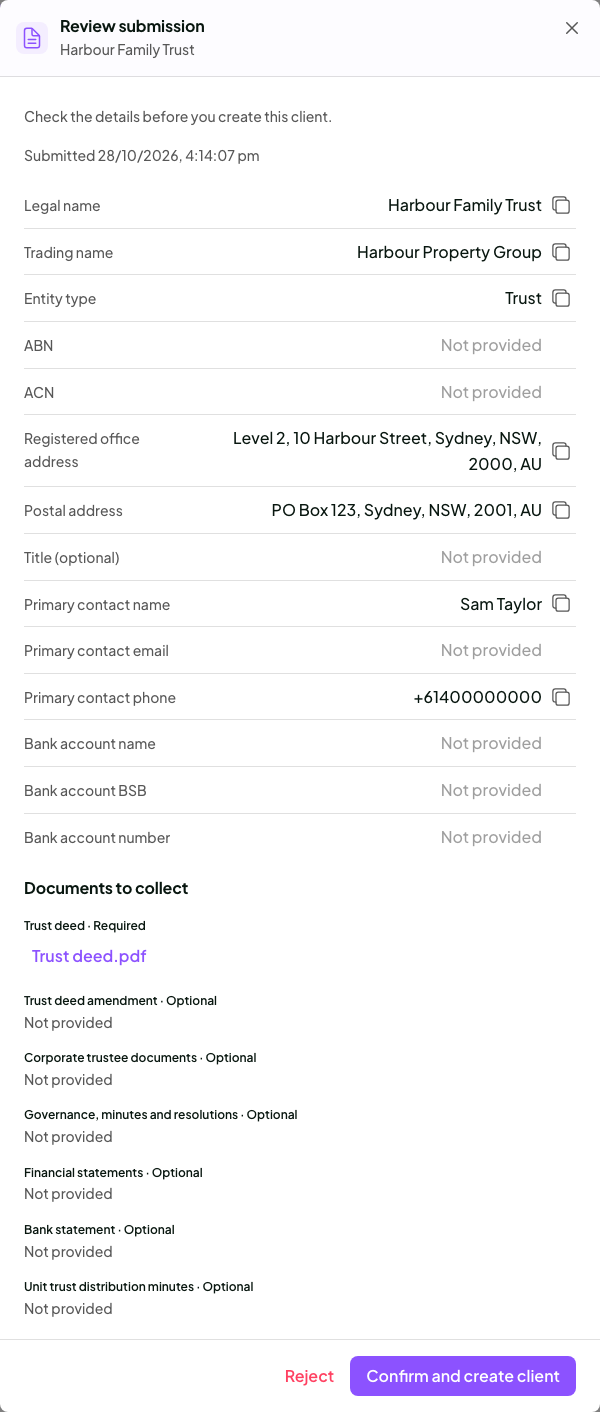
Uploaded documents are filed on the new client. If the client added several entities, confirm each one.

Turn on Trigger verification on submit to start ID verification when they submit. The check confirms identity only. It doesn't collect tax file numbers or bank details.
Bank details show only on the review screen. They aren't saved on the client, so copy them into your practice software when you review.
Expired links stop working and anything submitted is erased.
The link closes 30 minutes after the client submits their last entity.
Out of the box, only trust deeds are requested, as Optional.
With white-label branding on, clients see your logo and colours.
See what your client sees in Complete your onboarding form.
